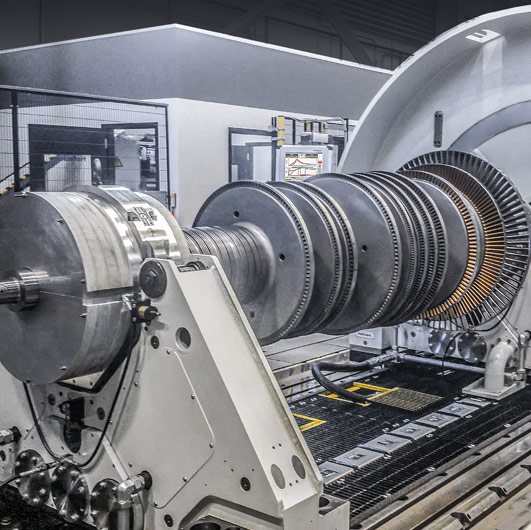
High-speed balancing installations and systems for high-speed balancing of flexible rotors; runout testing systems for the exact measurement of radial and axial runout.
Steam turbines, gas turbines, turbo generators and turbo compressors are machines whose rotors usually run beyond at least one critical speed. Therefore, they are balanced as flexible rotors. The HS type high-speed balancing and spin testing installations meet all requirements for balancing and spinning flexible rotors with multiple correction planes and multiple speeds. Flexible concepts – for example for propulsion and safety structures – enable Hofmann to optimally adapt the high-speed balancing and spin testing installations to specific project requirements, or to provide them as turn-key solutions.
In addition to balancing, rotors from turbomachines undergo further special tests.
For example, the field winding of a turbo generator is supplied with electric current in order to evaluate the influence of rotor heating on the balancing result. Magnetic field and electric impedance measurements are performed on the rotating rotor to determine the electrical properties and detect winding defects.
With many rotors from turbomachines, the runout testing must meet specific requirements. Hofmann’s type UHR runout testing machines measure all important runout values (total, mechanical, electrical) with the rotor set in V-blocks. To check on-site runout, the RO 7000 portable runout testing system is used.
Type HS 16 - 34
The high-speed balancing and over-speed testing installations are used to balance flexible rotors under operational conditions and to perform spin tests at over-speed. Hofmann HS installations cover rotor weights from just a few kilograms up to 100 tons.
Special features
Application

Additional product information
Type Quasar 2
Quasar 2 is an innovative unbalance measuring system designed for the economical balancing of flexible rotors and developed by professionals practiced in balancing flexible rotors. Uniquely, it combines low-speed and high-speed balancing in one unbalance measuring system. Quasar 2 supports high-speed balancing in many ways. For example, the unbalance of the rotor in its rigid state can already be distributed over several planes. This also reduces the modal unbalance of the rotor in the flexible state and thus reduces the overall effort. The influence coefficient method realized in Quasar 2 can work with single weights or - to increase efficiency - with modal weight sets. When calculating the unbalance correction for several balancing planes, unbalance and/or vibration limits can be specified. This avoids large correction weights in one correction plane.
Quasar 2 uses commercially available measuring hardware for high availability. In addition to vibrations, process values (pressures, temperatures, etc.) can be recorded to obtain an overall picture of the balancing process of a rotor. The measured values can be displayed and analyzed via freely configurable displays. Extensive protocol templates are available for reporting.
The option of working offline with Quasar 2 enables users to prepare data for an upcoming balancing project or to perform further analyses and generate reports after a project has been completed; allowing Quasar 2 projects to be shared across different locations. It is also possible to import data from other measurement systems and work with those.
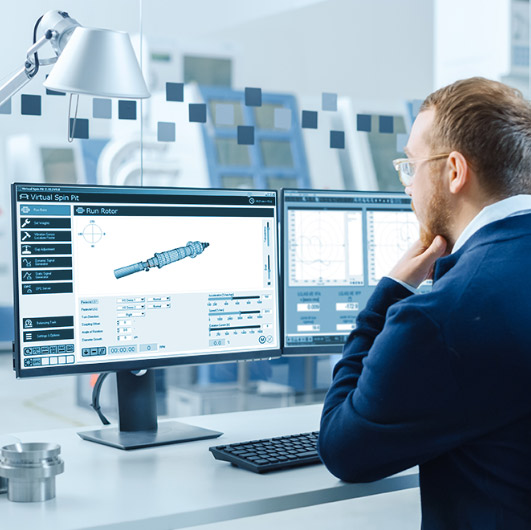
Quasar 2 has an optional training module that can be used to generate rotor vibrations and process values for a virtual high-speed balancing system. This makes it possible to learn how to use Quasar 2 effectively without risk and in an educational manner.
Quasar 2 is used in high-speed balancing systems from Hofmann. In addition, it is of course also suitable for retrofitting existing high-speed balancing systems of any kind.
Special features
Application

Type UHR
Hofmann’s UHR Runout-Testing Machines measure the radial and axial runout of rotors in multiple axial planes. A rotor is placed on pedestals with V-blocks for runout measurement and is driven jolt-free using an end-drive. The runout sensors are mounted to a measuring stand, which is positioned along the rotor axis. The sensors point to the rotor under a set angle and can be radially adjusted according to the rotor diameter to be measured. The signals of the runout sensors and encoder (connected to the drive system) are acquired and evaluated by the runout measuring software Orbistar 2.
Orbistar 2 enables setup of a specific measuring task, acquires and displays the measuring data, provides tools for data analysis and generates reports. This software can also compensate for the systematic measuring errors of the V-blocks and for shaft movement by using a reference sensor. The runout measurement results are used to compare actual values with target values and to perform corrections, when necessary.
A special feature of Orbistar 2 is its ability to measure electrical runout simultaneously with a tactile (mechanical runout) and an eddy current senor (total runout). The electrical runout is the difference between the total runout and the mechanical runout, i.e. the systematic measurement error of the eddy current sensor. This measuring value is useful when inspecting traces used for shaft vibration measurements.
Special features
Application
![[Translate to Englisch:] Horizontale Runout Prüfmaschine von Hofmann, Typ UHR](https://www.hofmann-global.com/fileadmin/user_upload/Produkte/Spezialloesungen/Turbomaschinen/hofmann_UHR_runout.jpg)
Additional product information
Type RO 7000
Runout quantifies a shaft radial or axial difference between ideal and actual surfaces or lengths. Runout will be checked during manufacturing or repair of a rotating shaft. Hofmann’s Portable Runout Inspection System RO 7000 provides a solution to measure radial and axial runout of rotors and other cylindrical parts in multiple axial planes. During a measurement, a rotor will be supported for example in a lathe, in V-blocks or on rollers. Rotors may be rotated by a motorized drive or manually. The system consists of a measuring controller to be hooked-up to a PC, a sensor set and the measuring software Orbistar.
The Software makes the difference
Orbistar helps to setup a specific measuring task, acquires and displays the measuring data, provides tools for data analysis and generates complete reports. At the same time the software compensates for the common influence of the shaft axis movement on the measurement. Therefore, special data evaluation algorithms and the use of reference sensors are key. This yields results which are comparable across different measuring devices.
Runout will be measured using proximity sensors which are supplied with brackets that interface to standard magnetic bases. The angular position will be captured with an encoder wheel, which is driven by the rotor surface, or using a speed sensor.
Electrical runout measurement included
A special feature of the RO 7000 is its capability to measure electrical runout simultaneously with a tactile (mechanical runout) and an eddy current senor (total runout). The electrical runout is the difference between the total and the mechanical runout, i.e. the systematic measurement error of the eddy current sensor. This measuring value is useful when inspecting traces used for shaft vibration measurements.
Special features
Application
Additional product information

Dipl.-Ing. Christian Sinik
Product Manager High-Speed Balancing Installations
Technical Sales
Tel.: +49 6157-949-137
Fax : +49 6157-949-100
csinik(at)hofmann-global.com